

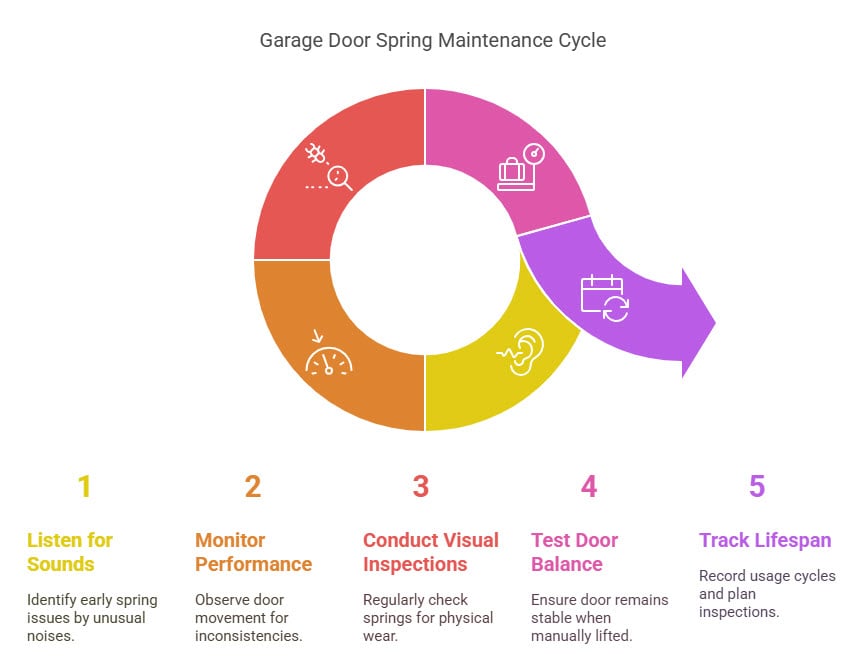
5 Pro Tips for Detecting Garage Door Spring Issues Before They Occur
Listen for Unusual Sounds
Pay close attention to any unusual sounds during door operation. Healthy torsion springs operate relatively quietly, while failing springs often produce distinctive warning noises. Listen for:
- Squeaking or grinding when the door operates
- Popping or cracking sounds from the spring area
- A loud bang or gunshot-like sound (indicates immediate spring failure)
- Uneven noise distribution during opening/closing cycles
Monitor Opening & Closing Performance
Your garage door should move smoothly and consistently. Early spring issues often manifest as:
- Door hesitating or jerking during operation
- Uneven movement where one side raises faster than the other
- Door struggling to fully open or closing too quickly
- Need for extra force from your Chamberlain or LiftMaster opener
- Door stopping at the same spot repeatedly during travel
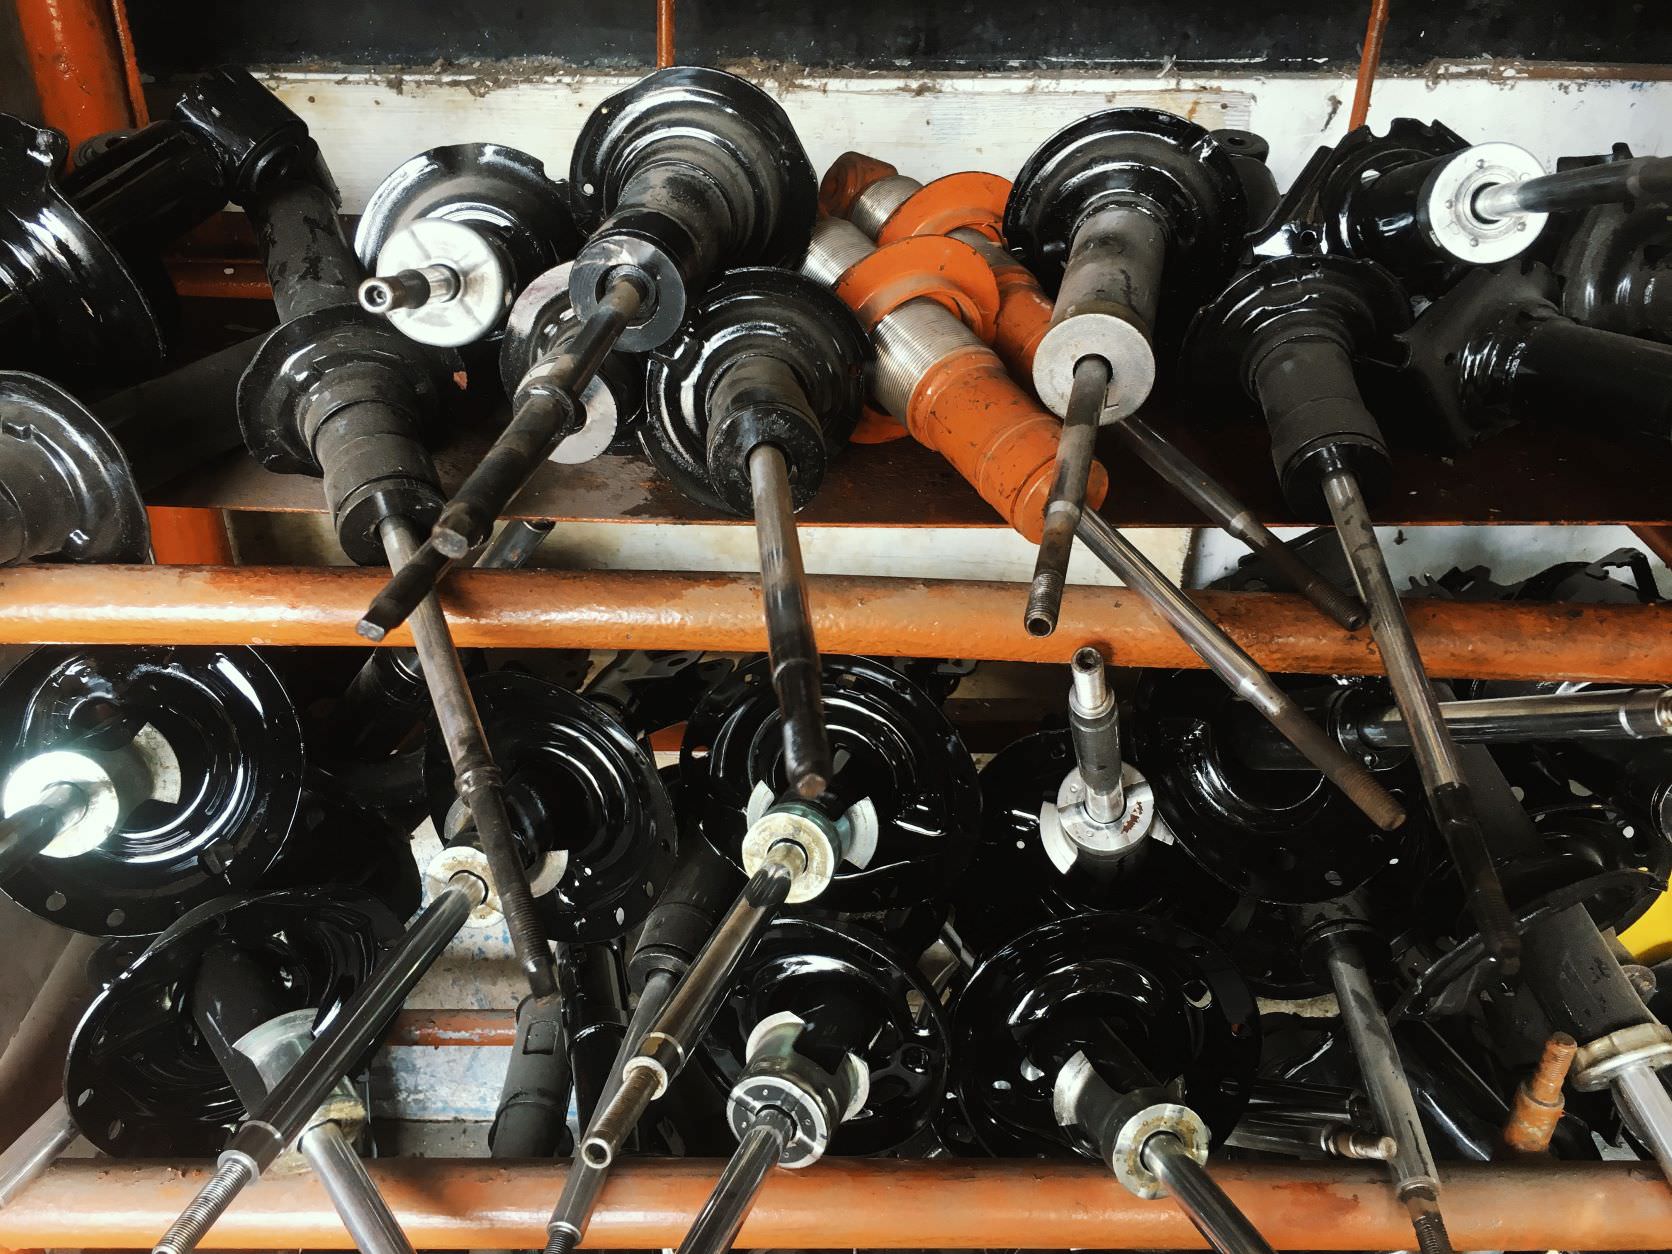
Conduct Regular Visual Inspections
Every 3-4 months, perform a detailed visual inspection of your springs:
- For torsion springs (mounted horizontally above the door), look for gaps or separation between spring coils
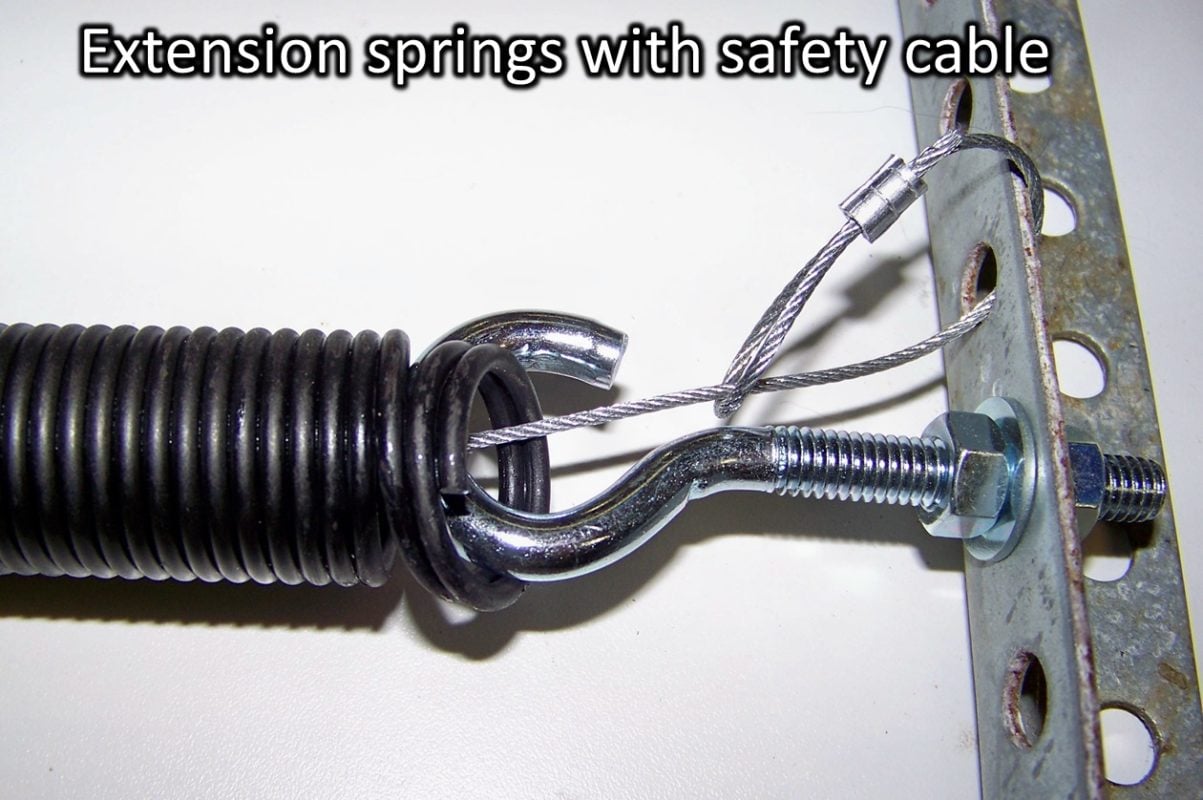
- On extension springs (running parallel to horizontal tracks), check for stretched sections or visible wear
- Examine spring attachment points for rust, particularly in humid climates like the Pacific Northwest
- Look for excessive rust or corrosion on Clopay or Amarr torsion spring systems
- Check for asymmetry between paired springs on dual-spring systems
Test Door Balance Regularly
A properly balanced door indicates healthy springs:
- Disconnect your Genie or Craftsman opener using the emergency release cord
- Manually raise the door to halfway position
- The door should remain in place without rising or falling
- If the door drops rapidly or rises on its own, your springs are improperly tensioned or failing
- Conduct this test quarterly for Wayne Dalton or C.H.I. door systems
Track Operational Lifespan
Most garage door springs have predictable lifespans based on usage:
- Standard torsion springs typically last 10,000-15,000 cycles
- High-quality Holmes or DURA-LIFT springs may last 20,000-30,000 cycles
- Calculate approximate cycles per year (4-6 daily operations × 365 = 1,460-2,190 annual cycles)
- Keep maintenance records for all Northwest Door or Raynor garage doors
- Schedule professional inspection when approaching 75% of expected spring lifespan
Implementing these proactive detection methods can help homeowners in areas like Caddo Mills, TX identify spring issues before catastrophic failure occurs, avoiding emergency repair situations and potential damage to opener systems like Overhead Door’s Legacy or Martin’s DC series models.
Important Safety Note:
When facing serious problems during your maintenance routine, especially those involving springs or cables, your best course of action is to call a qualified garage door specialist instead of tackling these potentially dangerous repairs on your own.