

Programming & SetUp Instructions
Charge the Battery
To begin the MyQ video keypad setup, first detach the back cover of your MyQ video keypad. Carefully remove the battery by pushing the battery’s bottom tab upwards and then remove the protective cover.
Next, plug the battery into a USB power source using the cable provided. It’s essential to fully charge the battery before completing the MyQ video keypad setup. You’ll know the battery is fully charged and ready for use when the LED light on the battery shifts from red to green.
NOTE: The process of charging your battery for the garage door keypad can take up to 10 hours.
Once the battery is charged, re-insert it into your smart keypad and reattach the back cover. The cover should click into place, indicating it’s secure. Upon completion, your smart keypad will begin to power on. You will observe the LED indicator on the smart keypad cycling through multiple colors during its reboot sequence before it starts flashing blue, signaling that the garage door keypad is ready for use in your smart home devices setup.
Download the myQ App
The myQ mobile app is an essential tool for your MyQ video keypad setup. To get started, use your smartphone to download myQ in one of the following ways:
- Scan the second QR code found on the packaging insert of your garage door keypad.
- Search for “myQ” in your phone’s app store.
- Visit myQ.com/app using your phone’s browser.
Ensure you have your Wi-Fi password ready before proceeding to connect your smart home device.
Get Connected
To effectively connect your garage door keypad, remain close to your installed garage door keypad opener. It’s important not to mount the keypad until a later step in the MyQ video keypad setup process. Open the myQ app and select the icon from the home screen, then choose ‘Device’. When prompted, select ‘Video Solution’, followed by Video Keypad, and adhere to the in-app instructions.
After completing the setup within the app, it’s time to confirm that your smart keypad is successfully connected to your opener and is operational:
- Enter the PIN you created on your smart keypad.
- Press the Home Button.
- Confirm the garage door has moved, indicating a successful setup of your garage door keypad in the realm of smart home devices.
Install Mounting Bracket
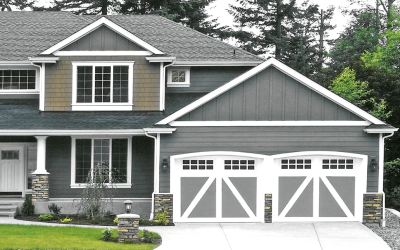
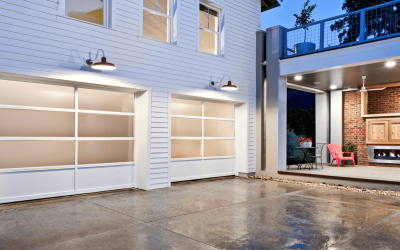
When preparing for your MyQ video keypad setup, the first step is to select an appropriate location to mount your garage door keypad. Ensure it’s at a minimum height of 5 feet (1.5 m) to keep it out of reach of small children. Consider the following when choosing a mounting location, especially for optimal camera view and convenience of your MyQ video keypad:
- Are there any additional entry points to my home I wish to monitor?
- Do I have a preferred view down the street?
- Which side of my home is more likely to witness activity?
- Is the location accessible for easy use of the garage door keypad?
Start by using the included mounting bracket as a template. Mark the position of the bracket’s mounting holes with a pen or pencil. It’s important to note that these holes may differ from those of any existing keypad.
For installing your smart keypad on stucco, brick, or concrete surfaces:
- Drill holes in your wall using a 1/4” masonry bit.
- Insert the included wall anchors by pushing them into place or lightly tapping with a hammer.
If you’re installing the garage door keypad on wood or vinyl siding, you won’t need the wall anchors, allowing you to skip this step. This step is crucial in ensuring your smart keypad is securely mounted, forming an integral part of your smart home devices network.
Install Mounting Bracket
Properly positioning the mounting bracket is a key step in the MyQ video keypad setup. Adjust the bracket so that the garage door keypad is oriented to your preference. If you’re using the 20° mount, the bracket can be flipped to adjust the angle based on your surroundings. It’s often recommended to angle the garage door keypad toward your driveway for optimal coverage.
Use the two Mounting Screws and a Phillips screwdriver to secure the bracket. Drive the screws into the wall (or into the anchors, if they were installed) through the mounting holes until they are flush with the bracket. This ensures that your smart keypad, an essential component of your smart home devices, is mounted securely.
Secure to Mounting Bracket
For securing the MyQ video keypad to either the 20° or 0° mounting bracket, slide the top of the MyQ video keypad into the ridges at the top of the bracket, then press the bottom of the keypad into the bracket. If you’re using the swivel mount, push the garage door keypad directly into the mount until it snaps into place, aligning with the ridges on the sides of the bracket.
When it’s time to remove the garage door keypad from any of the mounting brackets, firmly grasp the device from the bottom, then pull out and upwards. This step is crucial in maintaining the integrity of your garage door keypad and ensuring it remains a reliable part of your MyQ video keypad system.
Secure to Mounting Bracket
Once your MyQ video keypad is attached to the mounting bracket, it’s crucial to secure it properly. Use a Phillips screwdriver to tighten the included short security screw into the bottom of your device. This step ensures that your smart keypad is firmly in place, an important aspect of your smart home devices setup.
DO NOT USE any screw other than the included short security screw to secure your garage door keypad. Utilizing an incorrect screw could potentially damage the device, compromising the functionality of your smart keypad.
Using Your Video Keypad
Utilizing your MyQ video keypad is straightforward and enhances the security of your garage door keypad system:
- To open your garage, simply enter an assigned PIN and then press the Home Button.
- For one-touch closing when your garage is open, press the Home Button.
- To create an alert in the myQ app and view video in real-time, press the Call Button.
- You can assign up to 16 unique PIN codes for family, friends, and guests, enabling them to open the garage door using the myQ app.
- The smart keypad allows you to live stream HD video 24/7, complete with night vision and 2-way audio, adding a layer of security to your smart home devices.
- Customize notifications and settings easily using the myQ app to tailor the garage door keypad to your specific needs.
FAQs
What Is a myQ Video Storage Plan?
A myQ Video Storage Plan enhances your garage door keypad experience by allowing you to record and view videos for up to 30 days. This feature ensures you don’t miss any activity in and around your garage, even if you’re not there to witness events live. It’s a valuable addition to your smart home devices, providing peace of mind.
What Additional Features Do I Get?
With the myQ Video Storage Plan, you gain access to enhanced features like People Detection and Rich Notifications. These features offer more meaningful and actionable insights, allowing you to view and filter recordings in the app or download and share your videos. This integration elevates the functionality of your smart keypad.
How Much Does It Cost?
The plans for this added functionality start at $3.99 USD/month, with additional savings available for annual subscriptions. This makes the myQ Video Storage Plan a cost-effective way to enhance your garage door keypad and smart home devices.
How Do I Explore These Features?
Your MyQ video keypad comes with a complimentary 30-day trial of the myQ Video Storage Plan. You can easily subscribe to the plan at any time through the account settings in your app, further enhancing your smart keypad experience.
Troubleshooting
Reset Wi-Fi
If you need to clear existing Wi-Fi settings and connect your garage door keypad to a new network, press and hold the Reset Button for 10 or more seconds before releasing. The LED will turn solid blue and then start slowly blinking blue. Once it’s blinking, open the myQ app and follow the in-app instructions to connect to a new network.
Factory Reset
To completely reset your garage door keypad and clear all settings, follow the Wi-Fi reset instructions above. After the LED starts blinking blue, press and hold the Reset Button again for an additional 10 seconds before releasing. The LED will turn solid magenta before transitioning to the device boot sequence, ensuring your garage door keypad is reset and ready for new configurations.
Keywords
- Garage door keypad – primary keyword
- Smart keypad
- MyQ video keypad
- Smart home devices
- Video keypad
- Video keypad setup
Brands & Models that sync with MyQ Video Keypad
|
Brand |
Models |
|
Chamberlain |
B353, B373, B500, B503, B510, B550, B550C B730, B740, B750, B970, B1381, B2202, B2211T, B2212T, B2401, B2405, B4505T, B4545, B4603T, B4613T, B4643T, B6713T, B6753T, B6755, 6765, C203, C205, C253, C273, C450, C2102, C2202, C400, C410, C450, C455, C870, C2212T, C2405, 349544, 349544EV, D2101, HD220, HD220C, HD420EV, HD520EV, HD750WF, HD920EV, HD930EV, HD950WF, LW260C, LW2200 LW3000EV, LW5000EV, LW9000WF, PD220, PD222, PD612EV, PD752KEV, PD762EV, RJ020, RJ070, WD832KEV, WD850KEV, WD930EV, WD962KEV, WD962KPEV, WD962MLEV, 248730, 48930D, 7520, 9950D DCG40D, CG42D, HD200D, HD400D, HD420D, HD422D, HD600, HD800D, HD900D, LW2000, LW3000, LW3500, PD210, PD210D, PD212D, PD300, PD432D, PD462D PD610D, PD612D, PD612KLD, PD752D, PD758D, WD822KD, WD832KD, WD952KD, WD952LD WD962KD, 2200, 4200, 4620, 4640, 6200, 7220, 7320, 7420, 7902, 8200, 9200, 9902, 9950, 9960,CG40, PD210, PD212, PD420, PD420-2, PDPD610, PD612, PD752, PD785S, WD912K, WD922K, 710WHC, 711WHC, 1100, 2100, 4100, 4600, 5100, 7200, 8100, 8100M, CSO, |
|
LiftMaster |
8010, 8065, 8075, 8155, 8155W, 81550, 8160W, 8160WB, 8164W, 8165, 81600, 81602, 81650, 8165W, 83650-267, 8365-267, 8365-267W, 8355, 8355W, 8360, 8360W, 84501, 84504R, 84505R, 84602, 85503-267, 8557, 8557W, 8587, 85870, 8587W, 8500, 8500W, 8550, 8550W, 8550W-267, 85503, 84501, 84602, 87802, 87504-267, 98022, 1345, 1346, 1355, 1356, 3110, 3130, 3220, 3240, 3245, 3255, 3265, 3280, 3500, 3575, 3585, 3595, 3800, 3800P, 3800PLD, 3850, ATS2113X, ATS2113X-CX, HCT501130, LGO50113R, LGO20113XR, 985, 9851,1000SDR, 1200, 1240R, 1245R, 1246R, 1255R, 1256R, 1265, 1280R, 2000SDR, 2110, 2220, 2245, 2255, 2575, 2280, 2500, 2500B, , 2500D, 2580, 2589, 2265, 2565, ATS211R, ATS211X, ATS211, 215WD, 220WD, 315WD, 320WD, 1240, 1245, 1246, 1250, 1255, 1260, 1260LK, 1245LK, 1270, 1280, 1000SD, 2000SD, |
|
Raynor |
Admiral II, Airman II, Airman II with WiFi, Aviator II, Corporal II with WiFi, Pilot II, Corporal II, Prodigy II, Pilot II with WiFi, Prodigy II with Wifi, Ultra II, Ultra II with WiFi, Voyager, Sentinel, Sentinel™ 360, Sentinel™ III, ,Sergeant II, |
|
Craftsman |
CMXEOCG471,CMXEOCG981, CMXEOCG231,CMXEOCG571, CMXEOCG771, CMXEOCG781, 139.53997D, 139.53985DM, 139.53990DS, 139.5399011, 139.5399211, 139.53672, 139.53978SRT, 139.53995SRT, 139.53993D, 139.53992D, 139.53992, 139.53991, 139.53491SRT, |
|
Access Master |
M885, M8856 |
|
Australia |
|
|
Merlin |
MJ3800MYQ, MS125MYQ, MS105MYQ, MR855MYQ, MS65MYQ, MR655MYQ, MT3850EVO, MR555MYQ, MT110MYQ, MT120EVOPS, MT60EVO, MT100EVO, |