If you’re a homeowner, you know that regular maintenance is key to keeping your house in good shape. One of the most important components of your home’s exterior is the garage door, which provides security and access to your vehicle and storage space.
However, over time, the springs that help your garage door open and close can wear out or break, requiring replacement. Replacing your garage door springs yourself can be a cost-effective and rewarding DIY project. In this guide, we’ll walk you through the steps on how to install garage door springs, saving you time and money in the process.

Step 1: Gather your tools and materials
Once you’ve gathered all the necessary tools and materials, replacing your garage door springs can be a relatively straightforward process. Not only can doing it yourself save you money, but it can also give you a sense of accomplishment and pride in your home ownership. Keep in mind that it’s essential to identify which type of springs your garage door has before attempting the replacement.
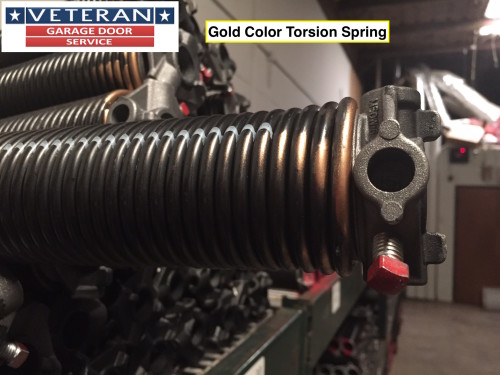
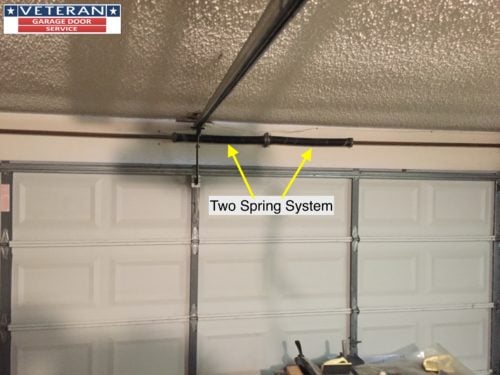
Extension springs are typically found on older garage doors, while torsion springs are used on newer models. In addition, make sure you purchase the correct size and weight capacity of springs to ensure proper function. As always, be sure to follow all safety precautions and manufacturer instructions carefully to avoid injury and ensure success. With a little patience and attention to detail, you’ll have a functioning garage door in no time!
Step 2: Disconnect the power source
Disconnecting the power source is a crucial safety step when it comes to replacing garage door springs. It’s important to make sure the door can’t move while you’re working on it to avoid any potential accidents or injuries. Once you’ve disconnected the power, it’s also a good idea to place a clamp or locking pliers on the door track to prevent the door from accidentally opening or closing. This will give you peace of mind as you work on the springs.
Additionally, it’s important to always work with a partner when replacing garage door springs. The process involves a lot of heavy lifting and can be dangerous if done alone. By following these important safety precautions, you can ensure a successful and injury-free garage door spring replacement project.
Step 3: Release the tension on the springs
Releasing the tension on the garage door springs is a crucial step in the replacement process. To do this, you will need to carefully remove the springs from their mounting brackets and let the door down slowly. It’s important to note that garage door springs are under a tremendous amount of tension and can cause serious injury if not handled properly. That’s why it’s essential to wear protective gloves and glasses and work with a partner throughout the process.
Depending on the type of springs you have, you may need to use pliers or an adjustable wrench to remove them from the brackets. It’s important to keep your hands and body away from the springs to avoid injury. By taking the time to release the tension safely, you’ll be well on your way to completing a successful garage door spring replacement.
Step 4: Remove the old springs
Now that the tension is released, you can proceed with removing the old garage door springs. The first step is to remove the nuts and bolts that hold the springs in place. Depending on the type of springs you have, you may need to use a socket set or an adjustable wrench to do this. Once the nuts and bolts are removed, gently lift the springs from the brackets and place them in a safe place.
It’s important to handle the old springs with care, as they can still be under some residual tension and can cause injury if mishandled. Make sure to keep the old springs away from children and pets, as they can be dangerous. Once the old springs are removed, it’s time to install the new ones and reattach the door.
Step 5: Install the new springs
Now that the old springs have been safely removed, it’s time to install the new ones. Begin by carefully placing the new springs into their brackets. Be sure to pay attention to the orientation of the springs and make sure they are facing the correct direction. Then, use the nuts and bolts that you removed from the old springs to securely fasten the new springs to the brackets. It’s important to make sure the springs are tightly secured to the brackets, as loose or improperly secured springs can cause the door to malfunction or even fall off the tracks.
Step 6: Re-tension the springs
Re-tensioning the garage door springs is an important step to ensure that the door functions properly and safely. After installing the new springs, you can re-tension them by slowly pulling the door up until the springs are tight. Then, use a drill to tighten the nuts and bolts and securely fasten the springs in place.
To determine if the garage door springs have the correct tension after re-tensioning, you can check the door balance by seeing if it stays in place when opened halfway. The door should also move up and down smoothly without any jerks or loud noises. To test the tension, lift the door about a foot off the ground and see if it stays in place without any assistance. If the door falls or moves, the springs may be too loose. If the door is difficult to lift, the springs may be too tight. Adjust the tension accordingly until you achieve the proper balance and functionality.
Step 7: Test the door
Testing the garage door is the final step in the garage door spring replacement process. After re-tensioning the new springs, reconnect the power source and open and close the door a few times to ensure that it operates smoothly. Make sure to listen for any unusual noises or jerking movements as these can be signs of improperly installed or faulty springs.
If the door operates smoothly and quietly, then the new springs have been successfully installed and you can feel confident that your garage door is functioning safely and reliably. It’s a good idea to check the garage door periodically after installation to ensure that it continues to function properly. If you notice any issues or concerns, it’s best to seek the assistance of a professional. With the proper installation and regular maintenance, you can extend the life of your garage door springs and enjoy a functional and secure garage door for years to come.
Replacing your garage door springs can be a challenging task, but following these steps can help you complete the process safely and effectively. However, if you’re not confident in your ability to replace the springs yourself, it’s always best to seek the assistance of a professional.
Veterans Garage Door is a team of experienced and reliable garage door repairers who can help you with all your garage door needs. They have the necessary skills and tools to safely and efficiently replace your garage door springs, giving you peace of mind and ensuring that your garage door functions properly. Don’t hesitate to contact Veterans Garage Door for all your garage door needs, including spring replacement, repairs, and maintenance. With their help, you can have a safe and reliable garage door for years to come.
Veteran Garage Door Repair
3415 Custer Rd #103
Plano, TX
75023
(972) 432-5695


