Setting the open travel limit
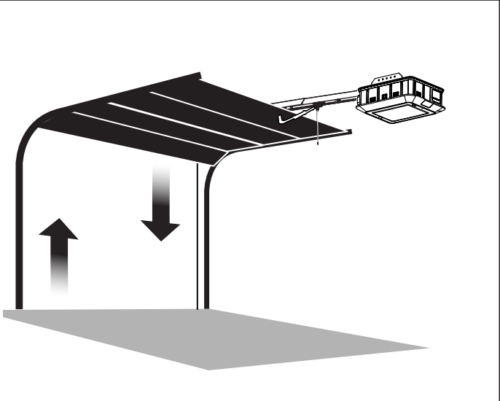
1. Make sure the garage door outer trolley is connected to the inner trolley.
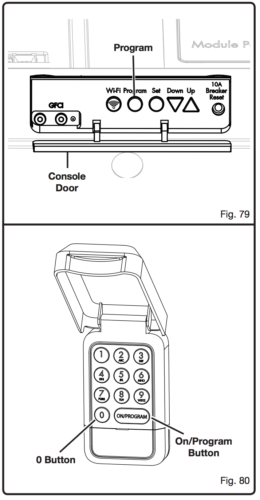
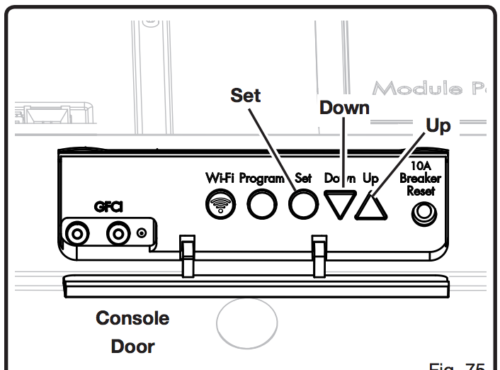
2. Open the console door on the back of the opener motor to access the programming buttons.
3. Press and hold the Up Arrow button for approximately 3 seconds. When you release the Up
Arrow button it will blink continuously until the open travel limit has been set.
4. Press and hold the Up Arrow button until the garage door reaches the desired fully open
position. You can use both the Up and Down Arrow buttons for final adjustment in door
position.
5. When the garage door is at the desired open position, press and release the Set button to save
the open travel limit. The Up Arrow button will stop blinking and stay lit.
Setting the close travel limit
1. Press and hold the Down Arrow button for approximately 3 seconds. When you release the
Down Arrow button it will blink continuously until the open travel limit has been set.
2. Press and hold the Down Arrow button until the garage door reaches the desired fully closed
position. You can use both the Up and Down Arrow buttons for final adjustment in door
position.
3. When the garage door is at the desired closed position, press and release the Set button to save
the close travel limit. The Down Arrow button will stop blinking and stay lit.
The opener will sense the weight of the garage door and the force limits will be automatically set.
Testing the travel limits
1. The garage door remotes or keypads until the travel limits have been tested.
2. Press and release the Up Arrow button. The garage door should open to the programmed open
limit.
3. Press and release the Down Arrow button. The garage door should close to the programmed
close limit.
4. When testing the open and close limit is complete, both Up and Down arrow lights should turn
off.
Turning module ports on and off
1. To turn on a module port, on the inside key pad, press the number for the corresponding port
you wish to turn on. Multiple ports can be on at the same time.
2. To turn off a module port, on the inside key pad, press the corresponding number for the port
you wish to turn off.
Programming outdoor keypad
1. On the outdoor keypad, press and hold the 1 or 3 button and the On/Program buttons at the
same time. The outdoor keypad LED lights will flash three times.
2. On the outdoor keypad enter your chosen four digit PIN. The outdoor keypad LED lights will
flash three times to indicate the PIN has been saved and the outdoor key pad is ready to be
programmed to the Ryobi garage door opener.
3. Press and hold the Program Button on the back of the garage door opener motor. The opener
LED lights will turn off and the back light for the Program button will flash three times. The
opener is now in programming mode.
4. On the outdoor keypad, press the On/Program button and then enter your four digit PIN. On
the back of the garage door opener motor the back light for the Program button will flash three
times and the garage door opener LED light will come on.
5. You will have 30 seconds to press the 0 button on the outdoor keypad. The garage door should
begin to move, this confirms the set-up is complete.
6. To use the outdoor keypad, first press On/Program button on the outdoor keypad and then
enter the PIN number.
Programming remotes
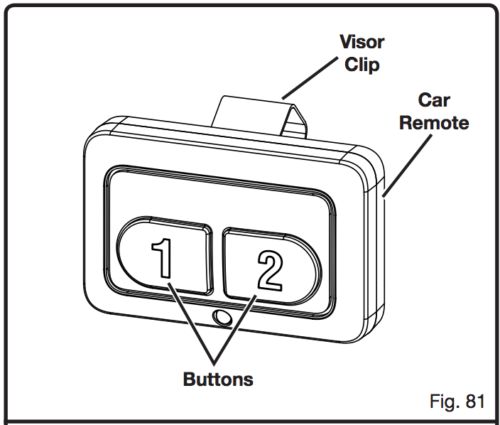
1. On the back of the garage door opener motor, press the Program button. The garage door
opener LED lights will turn off and the back light for the Program button will flash three times
2. On the remote press either the 1 or 2 buttons on time. The green LED light on the remote will
flash. On the back of the garage door opener motor, the Program button backlight will flash
three times and the opener LED lights will come on.
3. The remote is now programmed.
4. To test the remote, on the remote you just programmed, press the button you selected and
programmed. The garage door should open and close using this button.
5. Repeat step for each remote to be programmed.
Do you need garage door repair in Dallas TX?


